Fast and Cheap Restoration Technique - Live Stakes
What are live stakes?
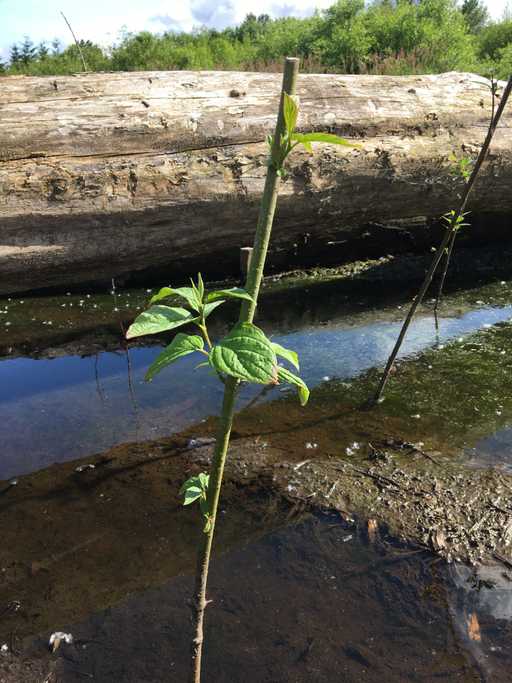
Lets start by talking about what live stakes are. Live stakes are simply hardwood cuttings taken from specific plants. These cuttings can be placed directly to the soil and will produce roots with no rooting hormones.
Why use live stakes over potted plants or seeds?
You may be wondering why wouldn’t I just use seeds are potted plants? Well the answer is live stakes are very economical and easy to install. They are sold at native plant nurseries are at your local native plant sale and cost only a couple of dollars a stake. The great thing about live stakes is if you no how to harvest them your self they are free! If you have a few of the plants mentioned below already growing on your property are at a friends house you can collect the plant material for free. One think I want people to realize about habitat restoration is that it does not always need to cost a lot and can be done in manageable steps. I hope I can continue to provide tips and methods that anyone can use for budget friendly restoration in future blog posts.
They can be used to stabilized hillsides, ditches, and streambanks and areas where you are experiencing problems with erosion. They are great for growing vegetation in wetlands and They are also great for shading out invasive plants that you make be having problems with.
Installing live stakes is very fast in comparison to digging holes for potted plants. Live stakes also produce roots quickly in the first few years meaning they will stabilize soils quickly.
What species can you live stake?
There are many species that you can live stake but since this blog is focused in the Pacific Northwest I will primarily talk about local species. However if you live outside of the pacific northwest there are likely species around you can apply this method to. Different species will have different success rates than others. The list below are species I have personally used and had at least a 50 percent success rating or higher (typically higher).
- Willlows (Salix spp.)
- Cottonwood (Populus balsmifera)
- Red osier dog wood (Cornus sericea)
- Twinberry honeysuckle (Loincera involucrata)
- Salmonberry (Rubus spectablis)
- Snowberry (Symphoricarpos albus)
- Pacific ninebark (Physocarpus capitatus)
- Red elderberry (Sambucus racemosa) or black elderberry (Sambucus nigra)
Harvesting Live Stakes
The first step in harvesting live stakes is waiting for the right timing. Live stakes need to be harvested in fall to winter once the plant has gone dormant. This means the plant has lost all of its leaves and is putting all of its energies into its root structures while it overwinters. Once the plant dormant harvesting can began.
Now that plants are dormant you can find your desired plant for harvest. When you have found the plant you will need a set of sanitized pruners or loppers. Sanitize the blades to ensure you do not introduce any pathogens to the cuts you will be making. This can be done with a diluted bleach solution or isopropyl alcohol. Just remember that bleach is corrosive so you will need to run the toll with clean water after using.
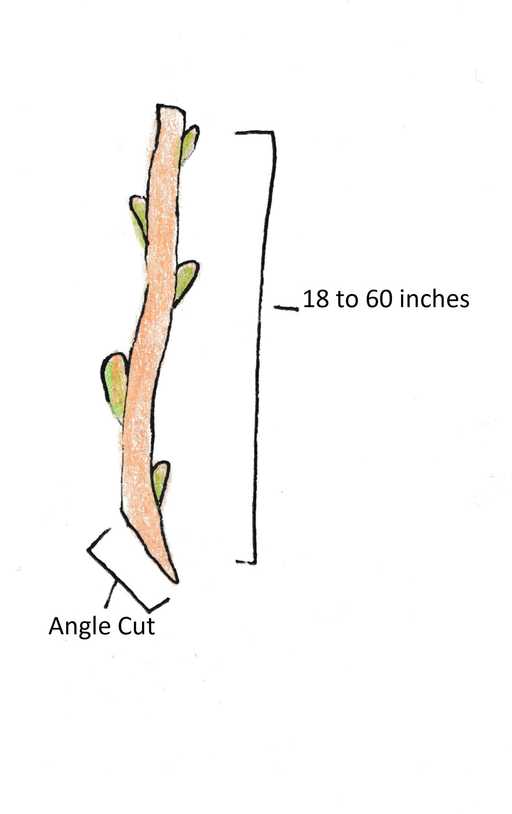
Now with sanitized pruners you will begin cutting. You are looking for branches that are straight and at least the width of a pencil or about 3/8 inch. Any smaller and success will drop. I typically do not use stakes that are larger than a inch diameter but have seen people successfully use larger cuttings. I personally find the larger cuttings more difficult to move around and drive into the ground for installation. You will cut branches that are as straight as possible. Once the branch is cut you will remove all the smaller twigs leaving only the main branch. The branch you will now cut into 18 inch to 60 inch stakes. The size depends on where you plant to install the stakes. If you are putting the stakes in wide open sunny areas with limited to no weeds you can cut your stakes on the shorter side. If you plan to install them in areas with lots of weeds or grasses you will want to cut them closer to 36 inches to 60 inches. The longer length will allow the new growth of the stakes in the spring to reach above the weeds and photosynthesis in the sunlight.
The top end of the stake you will want to have a flat top. This will make it easier to hammer into the ground during installation. The bottom of the stake you will want to cut at a angle. This angle will create a point that will drive into the ground easier. I have created a diagram to help visualize these cuts. One thing to note when harvesting live stakes you do not want to over harvest any one particular plant. Always try to cut from multiple plants to allow the harvested plant a chance to recover. Also always ask permission from landowners before harvesting if collecting outside of your home.
Using and Installing Live Stakes
For installation you will want to install in a region that has relatively most soil this will increase survival of the stakes. If it is on the drier side it can still work but success will decrease as the moister is needed to ensure good root establishment. You want to install these stakes will they remain dormant.
Installing live stakes is very easy to do. You will take the angled end of the live stake and drive it into the ground. Make sure that the buds of the plant are facing up to the sky. I cannot tell you how many times I have seen people install live stakes upside down resulting in u shaped branches and overall increased mortality. The live stakes want to grow up towards the sky, please help them accomplish this.
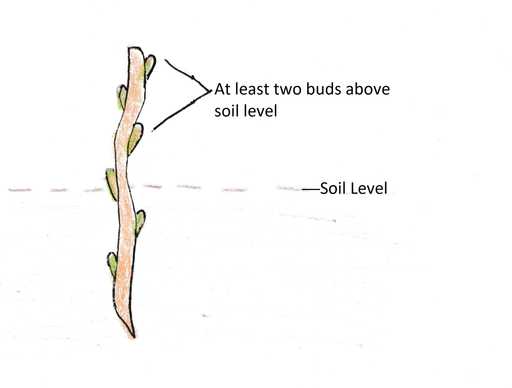
You want at least one foot of the stake of 1/3 of the stake to be under the soil line. If the stake can go deeper do. The stake can go as deep as you can get it but make sure at least two buds are sticking above the ground for new growth to emerge. If the ground is flat you will drive the stakes in perpendicular to the soil line. If you a on a sloped bank you will drive them at a 45 degree angle.
Spacing of the live stakes depends on your goals for vegetation. If you are looking for very dense vegetation you can do 2 - 5 foot on centers for spacing. If you are looking for less dense go for 8 - 10 foot on centers.
You can use mallet to help drive the stake into the ground. If the ground is very rocky you can use a metal stake or a piece of rebar to start a piolet hole before driving in the stake. This is the most simple installation of live stakes. I will cover fascines and wattles in a later post.
Storing Live Stakes
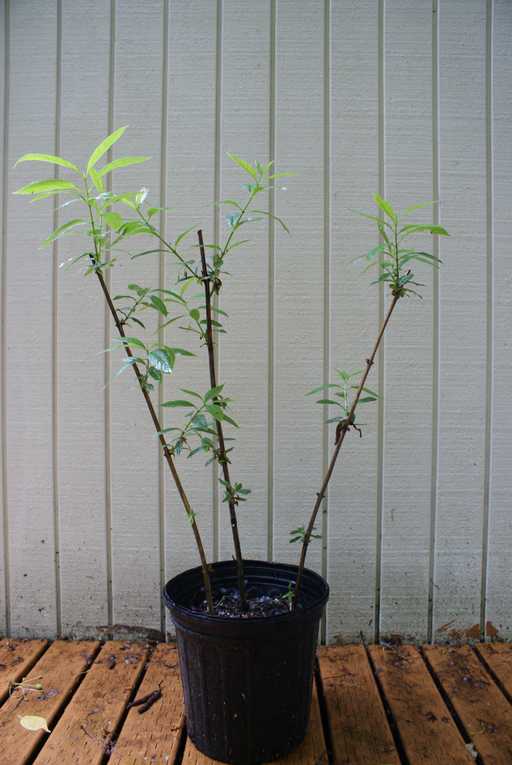
You will want to install live stakes relatively soon after harvest. Sooner the better. But they can be stored for about 2 weeks (I have gone as long as a month) if they are kept damp and cool. I often store mine with the ends in a bucket of water in a nice shady area. If you find you have harvested more live stakes than you can install you can pot up the extras. I will fill pots or buckets with soil and place directly into the soil like you would into the ground. This will allow the stake to grow roots and the next year you can plant it out as you would any other potted plant.
Live staking is a great tool for revegetating your property. With knowledge of finding, harvesting and installing I hope you are able to cheaply revegetate and restore the lands around you.


